
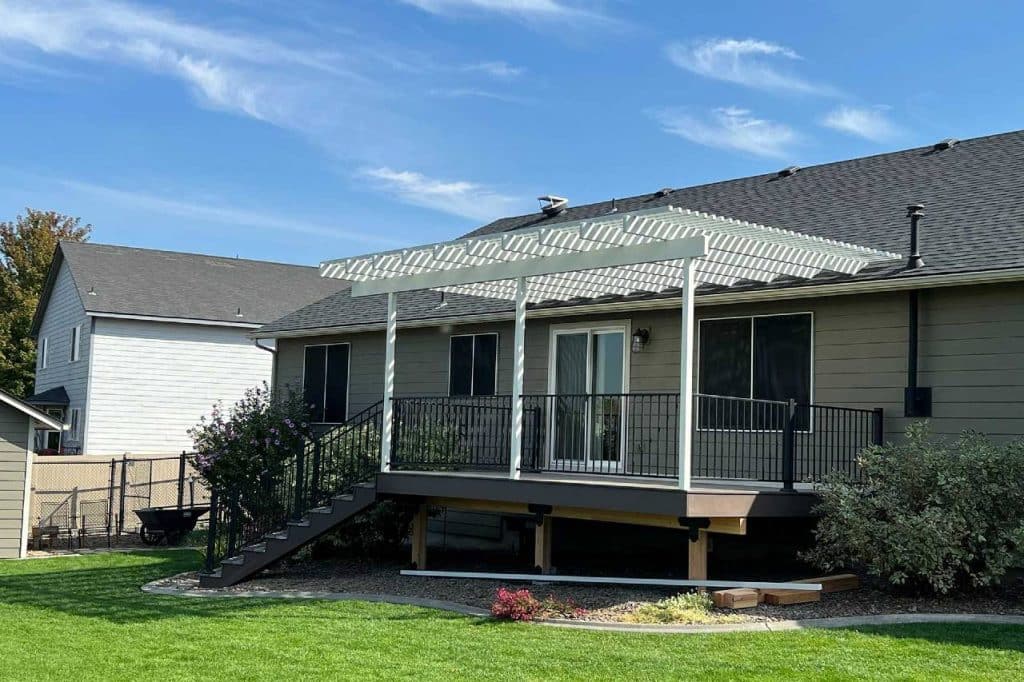
Adding a pergola is one of those upgrades that changes how you use your backyard. Suddenly, there’s shade where there wasn’t. Structure where it used to feel bare. A place in the fresh air to gather, relax, or just admire the space you’ve made your own.
Still, a lot of homeowners hesitate not because they don’t want a pergola, but because they’re unsure what the installation process actually involves.
Is it easy to install?
Do pergola kits exist?
What are the detailed instructions?

Will it take weeks?
Do you need permits?
Should you go with an attached pergola?
How do you know your own pergola is built to last?
From your first conversation to the final walkthrough, this guide breaks down exactly what to expect from a professional pergola installation.
Here’s what we’ll cover:
- What happens during your initial consultation
- How the right design and material choices are finalized
- Who handles the permits and scheduling
- What site prep looks like (and how long it takes)
- How your pergola is built and finished
- What’s included in the final walkthrough
- How Simpson Decks makes the process stress-free
Your Pergola Project Starts With a Conversation About Your Backyard Vision
A successful pergola installation starts with a good conversation.
This first phase is all about defining what you want from the space and the stable foundation. That includes discussing how much shade you’re looking for, what size works best, and which materials suit your taste and climate. Traditional wood offers a classic, natural feel. Vinyl is low-maintenance. Aluminum pergolas bring a clean, modern edge.
Once the vision is clear, the contractor will visit your property to assess layout, sun exposure, and existing outdoor area features like patios, garden beds, or outdoor kitchens. Drainage and slope are also evaluated to ensure stability and prevent future issues with pooling water or uneven settling.
After the site visit, the design is refined based on everything gathered. Homeowners often review layout sketches, top mounts, material samples, and cost estimates during this stage. The goal is to create a pergola that fits both the visual appeal of your landscape and your lifestyle, with no guesswork left on the table.
This phase typically takes one to two weeks, depending on schedules and revisions.
Permits, Paperwork, and Planning Without the Headaches
Depending on where you live and the size of your pergola, a permit may be required before construction can begin. Local building codes, zoning regulations, and HOA rules can all come into play. A professional contractor will handle this process on your behalf, including applications, inspections, and any communication with your HOA.
Permits often specify structural requirements, such as using concrete piers, precast piers, or concrete footings to support the pergola’s weight. These details directly affect the pergola’s stability, long-term performance, and structural integrity. A contractor familiar with local codes will follow the correct installation instructions to meet both safety and compliance standards.
Once the paperwork is underway, the next step is to finalize the installation timeline. This often depends on the delivery schedule for materials and the upcoming local weather conditions. You’ll receive a clear timeframe and updates if anything shifts along the way.
Many homeowners ask whether they need to interact with the city or manage permits themselves. The answer is no. When you work with a qualified contractor, all of that is taken care of for you. You’ll be informed, but you won’t be expected to manage the process.
Getting the Site Ready for the Build
Before any construction begins, the site needs to be properly prepared. This phase may not take long, but it sets a solid foundation for a safe and lasting permanent structure.
Clearing the Area
The first step is removing anything in the way of the build. That could include patio furniture, plants, gravel, or sections of lawn.
In some cases, minor excavation is needed to level the ground or create space for footings.
Marking and Measuring
Once the area is clear, the crew marks the layout using chalk lines or stakes.
Precise measurements are double-checked to make sure the pergola sits square and level. Post locations are marked and prepared for anchor installation.
Checking Soil and Drainage
The team evaluates the slope, soil type, and drainage pattern. This helps prevent problems like water pooling near the pergola posts or uneven settling after heavy rain.
What You Might Notice
Expect a bit of activity during this phase. You may hear digging or see light machinery being used. The work is usually clean and quick.
This stage is typically completed in a single day.
Quality Materials: How the Pergola Comes Together and What You’ll See Along the Way
Once the prep work is done, the structure starts taking shape. This is where homeowners really start to see their vision come to life.
Most pergolas are completed in two to four days, depending on the complexity of the design and site conditions.
Setting the Posts
The build begins with setting the vertical posts. These form the backbone of the pergola and need to be perfectly aligned and level.

Depending on your yard and the right materials, the posts may be installed using wet concrete slab footings or anchored into existing hardscaping with galvanized steel brackets. This step lays the structural foundation, so extra care is taken with alignment and spacing.
Building the Frame
Next, the horizontal cross beams are installed across the tops of the posts. These beams support the weight of the rafters and define the overall shape of the structure.
Once secured, the rafters are added perpendicular to the beams, creating the classic open pergola roof design. This is often when the pergola starts to feel real — the visual transformation of the space becomes noticeable.
Adding Features and Finishes
Some pergolas are left open, while others include extra elements like retractable roofs or slats for added shade, privacy walls, or integrated lighting. Once the structure is complete, finishes are applied. Depending on the material used, this might mean painting, staining, or sealing.
These final touches protect the structure from sun and moisture and create clean, smooth surfaces that are safe to touch and visually polished. Smooth finishes are especially important for wood, where splinters or uneven staining can affect the look and comfort of the pergola.
What to Expect On-Site
During this phase, expect to see tools like saws, drills, and ladders in use. There will be some noise and foot traffic, but a professional crew will keep things tidy.
Materials are usually stored neatly in one area, and work zones are cleaned up at the end of each day. Your yard stays safe, functional, and respected throughout the project.
Do You Need to Be Home?
Not necessarily. Most contractors assign a project lead who provides regular updates and lets you know if anything needs input.
Many homeowners check in at the end of the day to review progress, but you’re not expected to oversee anything.
The Final Walkthrough and What Happens After the Build
Once construction is complete, the crew removes all tools, hardware, and leftover materials from the site. Any dust or debris is cleaned up, leaving your yard fully usable and your pergola ready to enjoy.
Before wrapping up, the contractor will walk you through the finished structure and its durability. This includes reviewing the quality of the build, pointing out key features, and confirming that everything matches the original design.
If there are any final adjustments or questions, this is the time to address them.
Most homeowners also receive guidance on caring for their new pergola. That could include tips on when to reapply sealant, how to clean the structure, and what to watch for as it settles into place. It’s worth noting that weather, such as high winds, and location can affect maintenance needs.

Homeowners should regularly inspect the pergola for signs of wear, moisture buildup, or shifting over time. With proper upkeep, your pergola and secure attachments can last for decades and continue to be a central feature of your outdoor space.
Confidence Comes From Knowing What to Expect
A well-built pergola adds value to your home and rhythm to your backyard. It anchors the space. It creates somewhere worth spending time: not just in the summer, but across seasons.
That kind of transformation shouldn’t come with confusion or second-guessing. When the process is clear and the people doing the work respect your time, it becomes easier to move forward with confidence.
At Simpson Decks and Construction, we’ve built hundreds of custom pergolas throughout the Pacific Northwest. We understand how weather, soil, and seasonal patterns affect your outdoor space. We take the time to build around those conditions, not despite them. Our materials are sourced to last, and our process is designed to keep you informed without overwhelming you, which results in minimal maintenance.
If you’re thinking about adding a pergola, don’t wait for next summer to make it happen.
Ready to add shade and structure to your outdoor space?
Contact Simpson Decks and Construction today to schedule your consultation and start planning a pergola that fits your home and how you live. Reach out today!